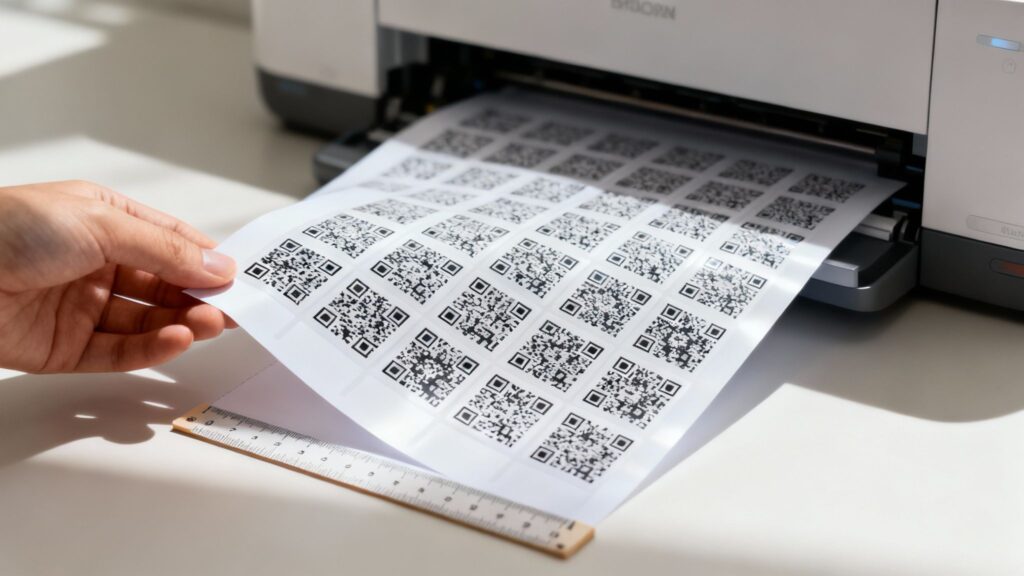
If you’re going to the trouble of printing a QR code, you need to make sure it actually works. The whole point is to create a physical link to a digital space, and if that link is broken, you’ve wasted time, money, and a customer’s attention. To get it right, you absolutely must start with a high-resolution format, like an SVG or a 300 DPI PNG, and print it with sharp contrast on a surface that won’t create a ton of glare.
This isn’t just about avoiding a technical glitch; it’s about protecting your brand and making sure your marketing efforts don’t fall flat.
Why High-Quality QR Code Printing Matters
Think of a printed QR code as a doorway. When someone scans it, they’re stepping through from the real world into your digital one. If the door is jammed shut, the opportunity vanishes. A poorly printed QR code is exactly that—a jammed door. The fallout goes way beyond a simple “scan error,” hitting your user experience, your brand’s reputation, and ultimately, your wallet.
We’ve all been there. You’re at a busy cafe and try to scan the little QR code on the table to see the menu. But it’s blurry or smudged, and your phone’s camera just can’t lock on. That tiny moment of friction is incredibly frustrating. It makes the business look careless and can even be enough to make a customer walk away.
Now, imagine that problem scaled up to thousands of product packages. You’ve printed a QR code that links to a helpful setup guide, but the glossy packaging creates too much glare for a camera to read it. Suddenly, your customer support lines are blowing up with calls that could have been avoided. Every failed scan is a missed connection and a ding against the trust your customers have in you.
The Real Cost of a Bad Print Job
The money you spent on flyers, packaging, or signage is only part of the story. The real loss is the engagement you never got. A massive banner at a trade show with a QR code printed too small to be scanned from the floor? That’s just expensive decoration. A tiny, overly complex code crammed onto a business card? It’s never getting scanned, which defeats the entire purpose of putting it there in the first place.
From restaurant menus and product labels to event tickets and interactive displays, the physical print quality is the final, crucial step. It has to be reliable. With QR code usage still on the rise, as you can see from recent QR code statistics, people just expect them to work.
How OpenQR Provides a Solution
This is exactly why thinking ahead and using the right tools is non-negotiable. I’ve seen too many campaigns stumble at the finish line because of a bad print job. A platform like OpenQR is built to sidestep these exact problems. It forces you to think about print quality from the very beginning by giving you high-resolution, print-ready files.
OpenQR helps you bypass the technical hurdles by providing QR codes in vector formats (like SVG) that can be scaled to any size without losing clarity—perfect for anything from a small product label to a massive billboard.
When you nail the print quality from the get-go, you’re ensuring your QR codes will do their job out in the wild. It’s a proactive step that protects your investment, makes life easier for your customers, and maintains a professional image for your brand. Getting the print right isn’t just a technical detail; it’s what makes the entire campaign succeed.
Getting Your QR Code Ready for Print
Before you even think about hitting “print,” there are a few foundational decisions that can make or break your QR code’s success. A perfect print job can’t salvage a poorly planned code. Nailing these early steps ensures your code isn’t just a pretty pattern, but a reliable tool that works in the real world.
Static vs. Dynamic: Your First Big Decision
The first choice you’ll face is whether to use a static or a dynamic QR code. A static code is permanent. The destination link is baked right into the code’s pattern, and it can’t be changed. Think of it like printing a phone number directly on a flyer—if the number changes, the flyer is useless. Static codes are fine for data that never changes, like a Wi-Fi password or a permanent link on a business card.
For almost any marketing or business application, however, dynamic codes are the way to go. A dynamic code points to a short, intermediate URL that you control. This means you can update the final destination link whenever you want, without ever having to reprint the code itself.
Imagine you’ve printed 10,000 product labels. If a static code points to a broken link, you’ve got a costly problem. But with a dynamic code, you just log into your dashboard, update the destination, and all 10,000 labels are instantly fixed. It transforms your printed materials into living, editable assets.
The real power of dynamic codes, beyond just being editable, is the data they provide. You can track how many people scanned your code, when they scanned it, where they were, and what kind of device they used. This is invaluable for measuring the real-world impact of your print campaigns.
Keep It Simple: Data Type and Complexity
Next up, think about what you’re actually encoding. A simple URL will generate a clean, sparse QR code that’s easy for any phone to scan. But if you try to cram in a long text string or a full vCard with tons of contact fields, you’ll end up with a dense, complex pattern.
These dense codes are much harder to scan, especially when printed at a small size or on a textured surface. The golden rule is to keep the encoded data as concise as possible. If you need more information on the best ways to generate your code, this guide on how to create QR codes is a great place to start.
Error Correction: Your Code’s Insurance Policy
This brings us to one of the most critical pre-print settings: Error Correction Level (ECL). This incredible feature is built into the QR code standard and allows the code to be read even if it’s partially damaged, dirty, or covered up.
There are four levels of protection you can choose from:
- Low (L): Can withstand up to 7% data loss.
- Medium (M): Can withstand up to 15% data loss.
- Quartile (Q): Can withstand up to 25% data loss.
- High (H): Can withstand up to 30% data loss.
Choosing the right level is all about context. Where will this code live? For something in a controlled environment, like a business card that stays in a wallet, Level L or M is perfectly fine. But for a QR code on a coffee cup sleeve that might get splattered, or a poster on a public wall exposed to the elements, you’ll want the higher protection of Q or H.
The only trade-off is that higher error correction makes the QR code pattern denser. It’s a balance between resilience and scannability, particularly for smaller prints.
Here’s a practical table to help you choose the right ECL for your project.
Choosing the Right Error Correction Level (ECL)
Selecting the right ECL is about predicting the future wear and tear your QR code will face. Use this guide to match the level of protection to your specific use case.
| ECL Level | Damage Resistance | Best For (Examples) | Code Complexity |
|---|---|---|---|
| Low (L) | ~7% | Clean, controlled environments like internal documents or personal business cards. | Lowest |
| Medium (M) | ~15% | Standard marketing materials like flyers, product packaging, and posters. A good default. | Low |
| Quartile (Q) | ~25% | Restaurant menus, public signage, or any item that will be handled frequently. | Medium |
| High (H) | ~30% | Harsh environments. Think apparel (t-shirts), industrial equipment, or outdoor banners. | Highest |
Ultimately, a higher level gives you peace of mind, ensuring your code remains functional even when conditions aren’t perfect.
By making these smart choices before you generate the final image, you’re setting yourself up for a successful print run. This groundwork is the difference between a QR code that just looks good and one that actually delivers results.
Getting the Technical Details Right: Format and Resolution
Once your QR code is designed, you need to get the file ready for the printer. This is where a lot of people trip up. Picking the right file format and resolution isn’t just a technicality—it’s the single most important factor that determines whether your printed code actually works.
Think of it like this: you wouldn’t use a tiny, pixelated image from a website for a massive billboard. The same logic applies to QR codes. Get the file wrong, and you’ve just printed a bunch of useless squares.
Vector vs. Raster: The Only Choice That Matters for Print
When you export your QR code, you’ll generally see two types of files: vector and raster. Knowing the difference is crucial.
Vector (SVG, EPS): This is the undisputed champion for anything print-related. Vector files are built with mathematical paths, not pixels. That means you can stretch an SVG file to the size of a bus, and it will stay perfectly crisp and sharp. If you’re working with a professional printer, they’ll almost certainly ask for a vector file. It’s non-negotiable for high-quality results.
Raster (PNG, JPG): These are pixel-based images. A PNG is fine for digital use (like on a website) or for very small, quick prints. It handles sharp lines and transparency better than a JPG. But if you try to enlarge a PNG, it will blur and become pixelated, making the QR code impossible to scan. You should avoid JPG files entirely for QR codes, as their compression can create little smudges and artifacts that confuse scanners.
The OpenQR platform makes this easy by giving you the right options from the get-go.
As you can see, you can download a high-resolution PNG or a scalable SVG, giving you the perfect file for any scenario, whether it’s for a website or a large-format print job.
Why 300 DPI Is Your Magic Number
Beyond the file type, you have to think about resolution, which is measured in DPI (Dots Per Inch). This simply tells the printer how much ink to place in a one-inch space. More dots mean a sharper image.
For professional printing, 300 DPI is the industry standard. Anything less, and you’re asking for trouble. Web images are often 72 DPI, and if you send that to a printer, your QR code will come out looking like a blurry mess that no phone can read. Always, always make sure your file is set to at least 300 DPI.
Pro Tip: When in doubt, always export your QR code as an SVG. It takes the guesswork out of resolution entirely. If you absolutely must use a raster format, choose a PNG saved at a minimum of 300 DPI.
Don’t Let Bad Color Choices Kill Your Scans
A colorful, branded QR code can look fantastic, but if a scanner can’t read it, it’s just a pretty decoration. The golden rule here is high contrast. There’s a reason the classic black-on-white QR code is so common—it works every single time.
I’ve seen a lot of great campaigns fail because of these simple color mistakes:
- Light-on-Light: A yellow code on a white background is practically invisible to a phone’s camera.
- Low Contrast: Think medium gray on a light gray background. It might look sleek, but it’s a recipe for scanning errors.
- Inverted Colors: A white code on a dark background can trip up older scanning apps. While most modern phones can handle it, you risk alienating some users. It’s a gamble that’s rarely worth taking.
With the QR code market valued at over $13.04 billion and 2.2 billion people scanning them, you can’t afford to get this wrong. A simple color mistake can cut you off from a massive audience. You can dig deeper into the numbers with the global QR code adoption report for 2025.
The printing method you choose also affects the final output. To learn more, check out our guide on digital printing vs offset to figure out what’s best for your project. By starting with a vector file, high resolution, and strong contrast, you’re setting yourself up for a QR code that scans flawlessly every time.
How to Print QR Codes That Work Every Time
Here’s a step-by-step guide to take you from creation to a successful print run, using practical examples to illustrate each point.
- Create a Dynamic QR Code: Always choose dynamic for business use. This allows you to change the destination link later without reprinting. OpenQR simplifies this, letting you create a dynamic code and manage it from a central dashboard.
- Choose the Right Data: Keep the destination URL as short as possible. A shorter link means a simpler, less dense QR pattern that is easier to scan.
- Set High Error Correction: In your QR code generator, set the Error Correction Level (ECL) to ‘Q’ (Quartile) or ‘H’ (High), especially if you plan to add a logo or print on a surface that might get damaged.
- Download in Vector Format: Always download your final QR code as an SVG file. This is the single most important step for ensuring print quality, as it allows for perfect resizing.
- Test Before You Print: Print a sample on the actual material you will be using (e.g., glossy paper, cardboard, vinyl). Scan it with multiple phones (old and new) from various angles and distances to confirm it works perfectly.
Real-World Use Cases for Printed QR Codes
- Restaurant Menus: A cafe prints a QR code on table tents. The dynamic code links to a digital menu. When the seasonal menu changes, they simply update the link in their OpenQR dashboard—no need to reprint a single tent.
- Product Packaging: A tech company adds a QR code to its product boxes linking to a video setup guide. This reduces customer support calls and provides a better user experience. They use a high error correction level to ensure scannability even if the box gets scuffed during shipping.
- Event Banners: At a conference, a large banner features a QR code linking to the event schedule. The code is printed as a 1-meter wide SVG to ensure attendees can scan it from 10 meters away, following the 10:1 size-to-distance ratio.
- Business Cards: A real estate agent’s business card has a QR code that links to a virtual tour of their featured property. It’s a dynamic code, so they can update it every time a new property is listed.
The Crucial Final Step: Testing and Troubleshooting
You’ve designed the perfect QR code, and now you’re ready to hit “print” and send it out into the world. Hold on. This is where a lot of great campaigns fall flat. A code that looks flawless on your screen can easily fail in the real world, and skipping a proper test run is a gamble you don’t want to take.
Before you even think about a full production run, always print a single test version first.
This isn’t just about a quick scan to see if it works. It’s about printing a sample on the exact material you plan to use—whether that’s glossy cardstock for a business card, a massive vinyl banner, or even a cotton t-shirt. This one simple step will immediately show you if there are problems with glare, texture, or ink bleed before you’ve committed your entire budget.
Creating a Real-World Testing Protocol
I’ve seen it a hundred times: someone scans the code once with their own brand-new phone and calls it a day. That’s not a real test. Your audience uses all sorts of devices and apps, and your testing needs to reflect that reality.
A solid testing plan should always include:
- Multiple Smartphone Models: Grab an older iPhone and a mid-range Android, not just the latest flagship model. Camera quality varies dramatically, and what scans instantly on a new phone might be completely unreadable on a device that’s a few years old.
- Various QR Reader Apps: While most people use their phone’s built-in camera, some still rely on third-party scanner apps. Download a few popular ones and test with those, too, just to be safe.
- Different Distances and Angles: Don’t just scan it flat on your desk. Get up and move around. Try scanning it from the actual distance a user would. If it’s for a poster, that might be ten feet away. Test it from sharp angles, not just straight on.
Your goal is to mimic how a real person will interact with your code. If the QR code is on a coffee cup, hold the cup and try scanning it. If it’s on a storefront window, test it in direct sunlight and again on an overcast day.
Common Print Problems and How to Fix Them
When a test scan fails, don’t panic. The culprit is usually one of a few common issues, and the fix is almost always straightforward.
Problem: My Code Is Blurry and Won’t Scan
This is almost always a resolution or file format issue. Chances are, you used a low-DPI raster image (like a JPG or a small PNG) and tried to scale it up.
- The Fix: Go back to your QR code generator and export a vector file (SVG). Vector graphics can be scaled to any size—from a postage stamp to a billboard—without a single pixel of quality loss. If you absolutely must use a raster format, make sure it’s a PNG saved at 300 DPI.
Problem: It Only Scans When I’m Right on Top of It
This means your printed code is simply too small for its intended scanning distance.
- The Fix: Stick to the 10:1 distance-to-size ratio as a rule of thumb. If you expect someone to scan your code from 5 feet away (that’s 60 inches), the code itself needs to be at least 6 inches wide. Enlarge the code and run another test print.
Problem: It Won’t Scan in Low Light or From an Angle
This points directly to a lack of contrast. That stylish gray code on a light gray background might look great to you, but it’s a nightmare for a phone camera to read.
- The Fix: Boost the contrast. Black on white is the undefeated champion for a reason. If you’re using brand colors, make sure there’s a very clear, sharp difference between the code’s color and the background.
These issues are common, but they’re also entirely avoidable with a few minutes of testing. For a deeper look at other potential hiccups, our guide on QR code scanning problems has even more solutions. With the QR code payments market alone projected to reach nearly $100 million users in the U.S. by 2025, making sure your codes work perfectly isn’t just a good idea—it’s essential.
Your Top QR Code Printing Questions, Answered
Even when you think you’ve got it all figured out, a few tricky questions can pop up right before you hit “print.” I’ve been there. Let’s walk through some of the most common issues I see and get you the clear, practical answers you need.
What’s the Absolute Smallest I Can Print a QR Code?
I get this question all the time, especially for things like business cards or small product labels. The hard-and-fast minimum is 2 cm x 2 cm (that’s about 0.8 x 0.8 inches).
Go any smaller, and you’re just asking for trouble. Most smartphone cameras, particularly older ones, will struggle to focus and read it correctly.
But here’s the thing: that 2 cm rule is really only for simple codes (like a basic URL) on a perfectly flat, clean surface. If your code holds more data or you’re printing on a slightly textured material, you’ll want to give it more breathing room.
Think about a QR code on a restaurant menu. Sure, a 2 cm code might work, but bumping it up to 3 cm x 3 cm makes the scanning experience seamless for a customer who’s in a hurry. Little details like that make a big difference.
Do I Really Need That White Border Around the Code?
Yes. 100%. Don’t even think about removing it. That border has a name—it’s called the quiet zone—and it’s absolutely essential for reliable scanning.
The quiet zone acts as a buffer, telling the scanner app, “Hey, this is the code, and everything else is just noise.” Without it, nearby text or graphics can bleed into the scanner’s view and confuse it, leading to frustrating scan failures.
A good rule of thumb is to make the quiet zone at least four times the width of one of the tiny black squares (modules) in your code. The good news is that a quality generator like OpenQR usually adds this padding for you automatically, so you don’t have to stress over getting it right.
Can I Use My Brand Colors or Add a Logo?
You definitely can, but this is where you have to be smart about it. Branding is great, but scannability always comes first.
If you’re using brand colors, the contrast between the foreground and background has to be strong. A light gray code on a white background? Forget it. A scanner won’t be able to see it. Stick to dark colors on light backgrounds.
Adding a logo in the middle is a fantastic touch, but you have to compensate for the data it covers up. This is where the Error Correction Level (ECL) becomes your best friend. By setting the ECL to a high level (like ‘Q’ or ‘H’), you’re building in redundancy, allowing the code to work perfectly even with a chunk missing from the center.
Here’s my go-to process for safely adding a logo:
- Fire up a generator that handles logo integration, like OpenQR.
- Immediately crank the Error Correction Level up to High (H). This is non-negotiable.
- Upload a simple, high-contrast version of your logo.
- And most importantly: always do a test print. Scan it with multiple phones to make sure it works flawlessly before you print a thousand of them.
Why Won’t My QR Code Scan From Far Away?
This is a classic billboard or trade show banner problem. The issue isn’t the code itself; it’s the size-to-distance ratio. The QR code has to be big enough for a phone’s camera to capture it clearly from where the person is standing.
Just remember the 10:1 distance-to-size ratio. It’s a lifesaver.
If you expect people to scan your code from 10 feet away, the code itself needs to be at least 1 foot wide. It’s a simple bit of math that ensures your large-format prints actually work in the real world.
Ready to create QR codes that are perfectly optimized for printing? OpenQR provides high-resolution vector downloads, customizable error correction, and an intuitive design process to ensure every code you print works flawlessly. Start your free 14-day trial today and see the difference for yourself.